Centre
From a box of stock to a statement, on your phone
Everything a dealer does in Dealer Centre, in the order you will do it. Ten minutes to read, a minute per item after that.
Sign up and add your card
There is no password. You sign in with a link sent to your email, every time.
- 1Go to thedealercentre.co.uk and press Start free.
- 2Enter your email, open the link it sends you.
- 3Name your business and choose your dealer code: two to four letters, usually what you already write on your tickets (B14, JH, RM).
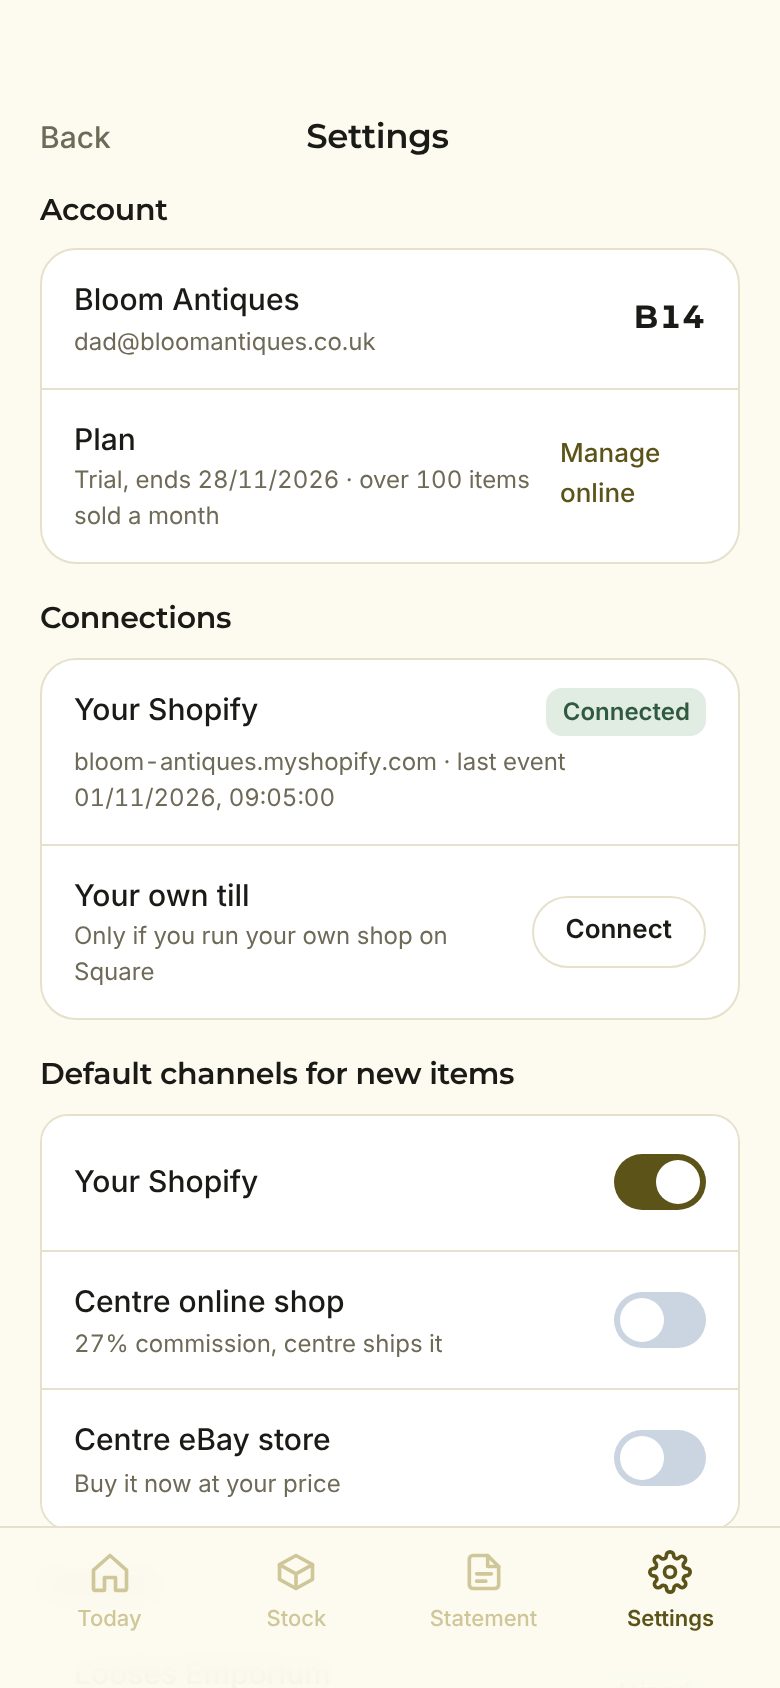
- 4Pick a plan by how much you sell a month, add a card. Nothing is charged for 14 days.
Join your centre
Search for the centre by name or town. If it is on Dealer Centre you ask to join and they approve you. If it is not, add it yourself and carry on; nothing changes for you when they join later.
- 1Type the centre name.
- 2If the centre has already set you up, you will see your name in a list: tap it and your code and history come with you.
- 3Say whether you pay rent or commission only, and how much. The centre can correct it.
- 4Press Ask to join. Until they approve, you can still list.
List an item
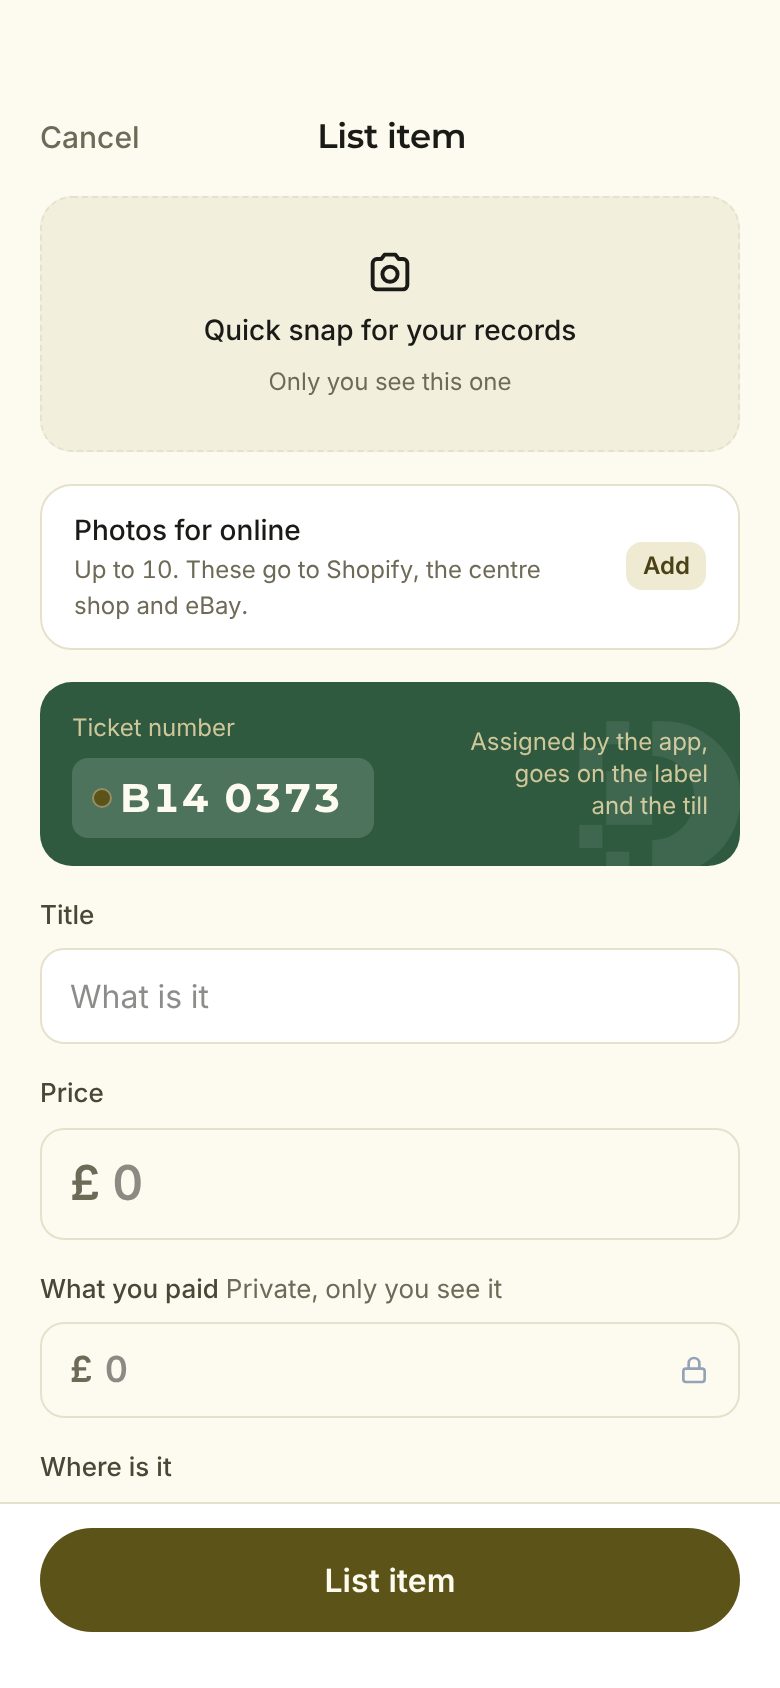
This is the whole job. A quick snap for your own records, a title, a price, and what you paid (private). Press List and the ticket number is assigned and the label prints at the centre.
- 1Press List item on Today.
- 2Take a quick snap. Only you see this one.
- 3If the item is going online too, add Photos for online: up to ten, first one is the cover.
- 4Title and price. What you paid is optional and private; it powers the margin screen.
- 5Toggle where it goes: your Shopify, the centre shop, eBay. The centre floor is always on.
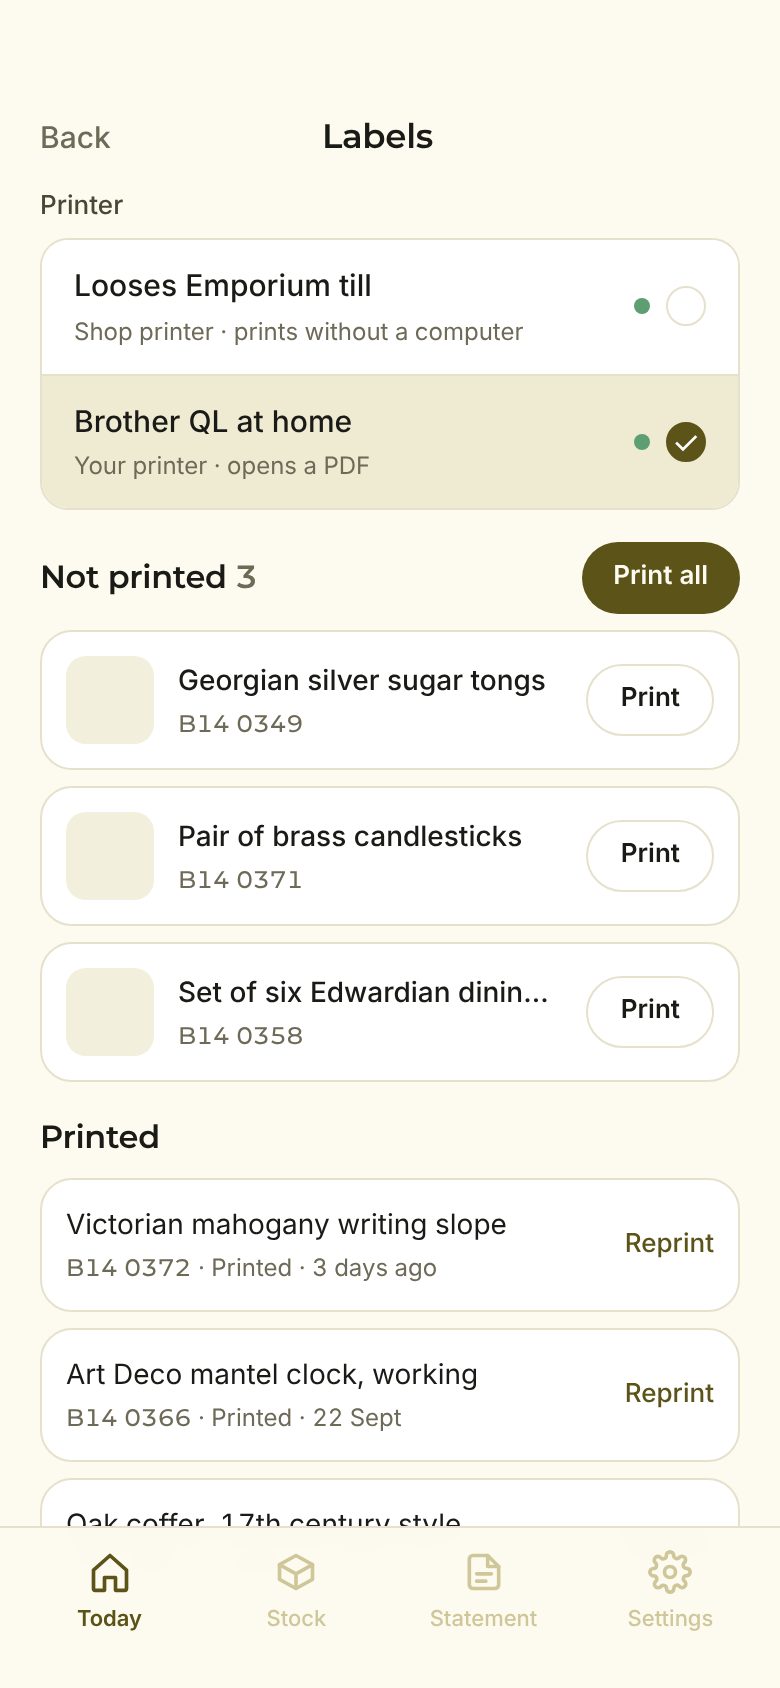
- 6Press List item. The label prints at the centre printer, or opens as a PDF if you print at home.
The label and the ticket number
Every item gets one number, like B14 0372. It is on the label as a barcode and as words. The centre till scans it; the till screen or End of day can type it; your Shopify uses it as the SKU. One number, everywhere.
When it sells
On the floor, the centre records it (till, iPad or End of day) and your phone buzzes within a minute. Online, Shopify or the centre shop tells us. Either way it comes off everywhere else the moment it sells.
- 1Turn on notifications from the card on Today. On iPhone, add the site to your home screen first.
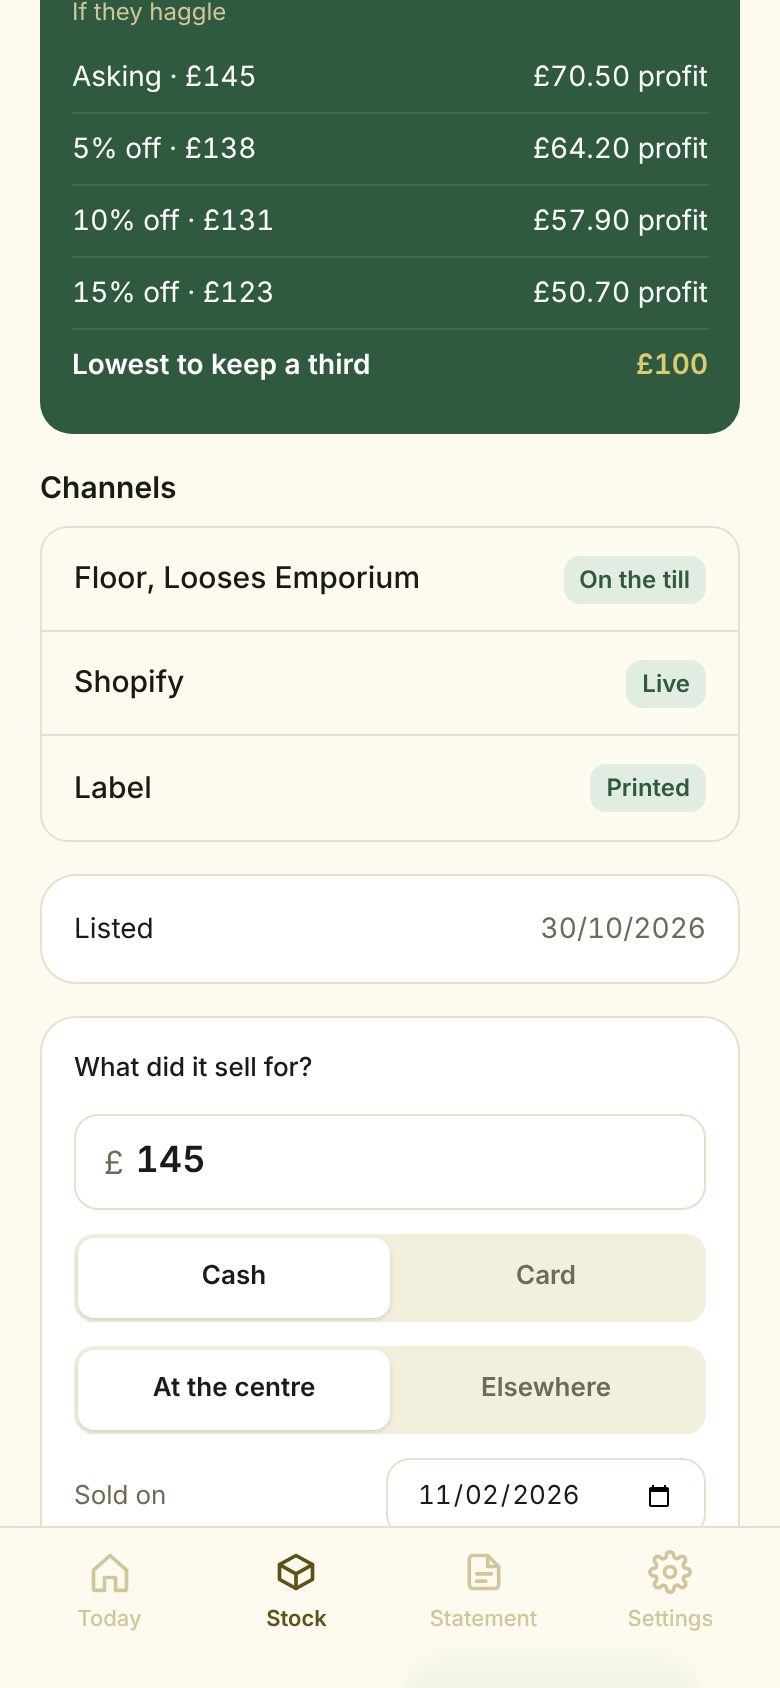
- 2Sold it yourself, cash in your pocket on the pitch? Open the item, Mark as sold, At the centre. It goes on your centre statement with commission, same as the till.
- 3Sold it at a fair or from home? Mark as sold, Elsewhere. No commission, and it is closed on Shopify and the till.
Know your margin before you haggle
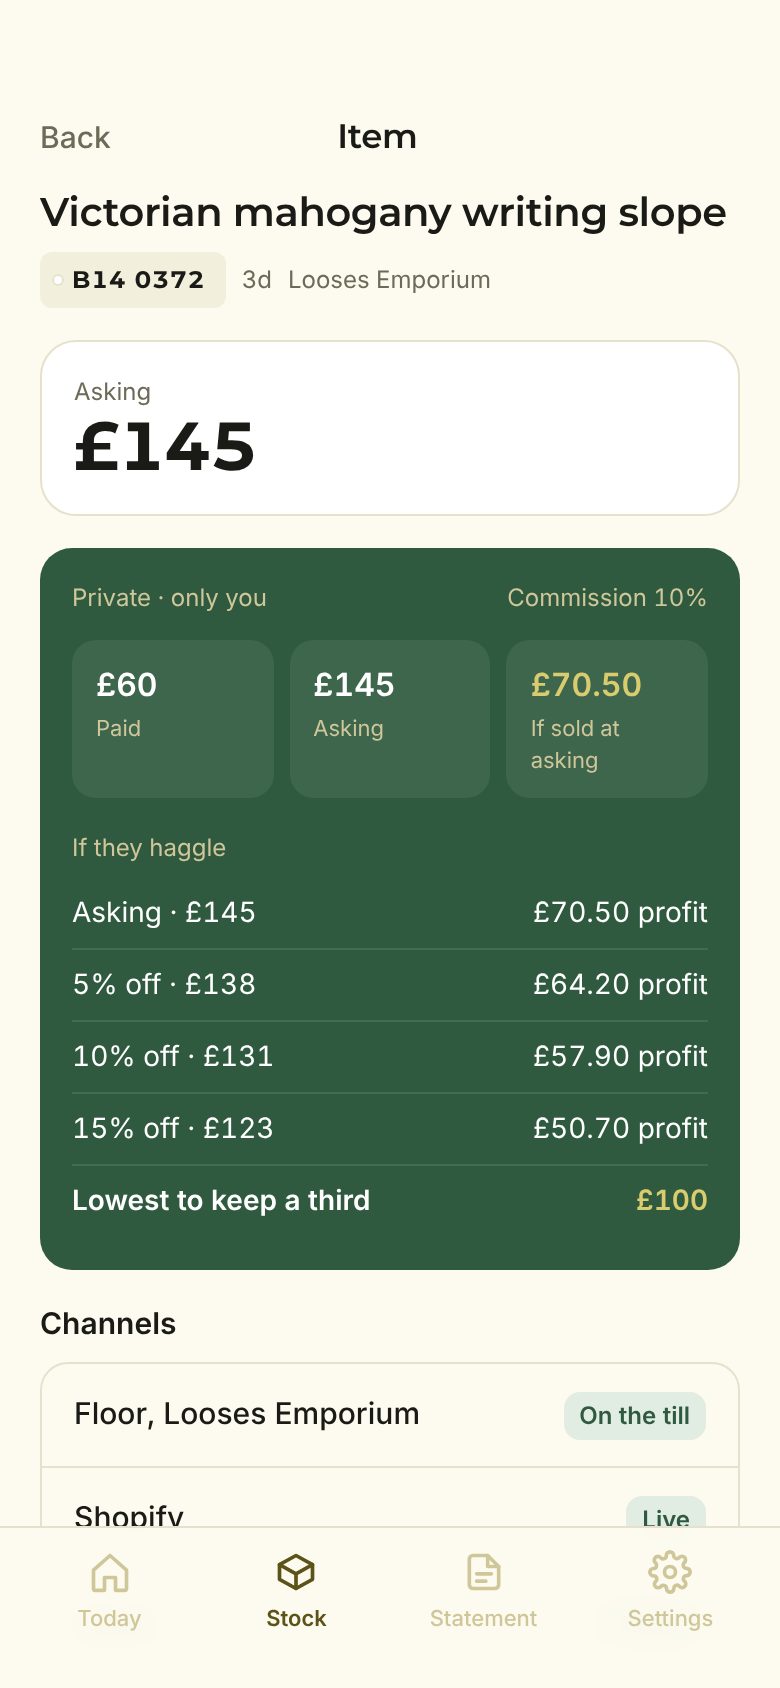
The dark card on every item is private to you. Paid, asking, profit at asking, then what you keep at 5, 10 and 15 percent off, after the centre's commission. The last line is the lowest price that still keeps a third.
Fixing a mistake
Discounts happen and tickets get keyed wrong. Open the sold item: Correct sold price changes the figure (the original is kept for the audit trail), Undo sale puts it back on sale everywhere. The centre can do the same from End of day, and both of you see the correction.
Your own Shopify
Optional. Connect it once in Settings and every item you toggle on appears in your shop with the same ticket number as its SKU. Sell it on the floor and the Shopify listing closes. Sell it on Shopify and the till closes.
- 1Settings, Connect Shopify, enter your store address (yourstore.myshopify.com).
- 2Approve Dealer Centre in Shopify.
- 3From then on the Your Shopify toggle is on by default when you list.
Your statement
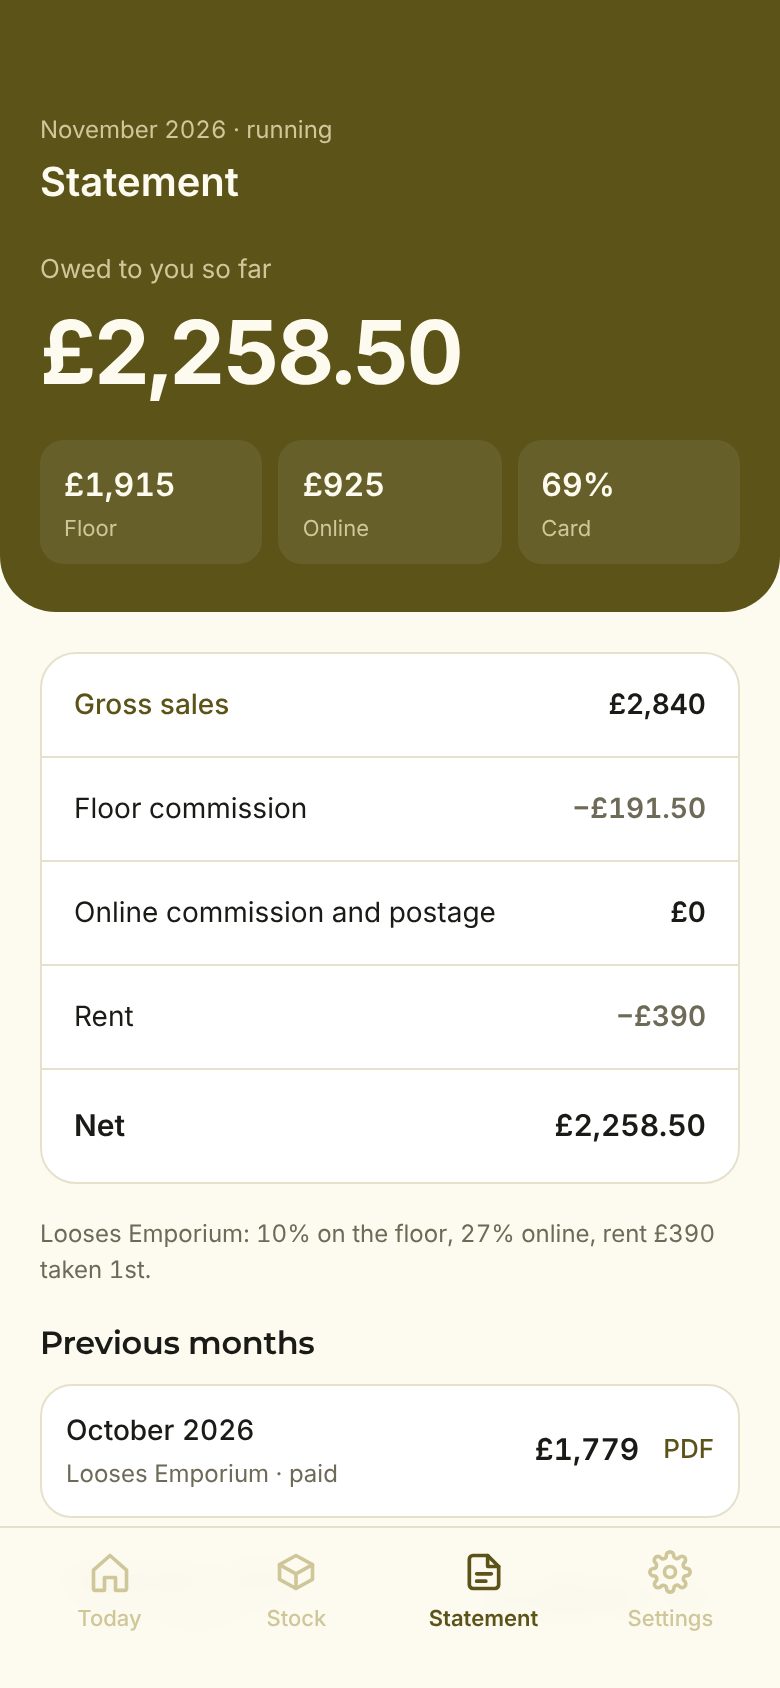
Running total for the month: floor sales, online sales, commission, rent, and what is owed to you. Previous months have a PDF. If the centre takes rent on the first, that is already in.
Plans and changing them
Plans go by what you sell a month, not what you list: up to 25, up to 50, over 100. Listing is never blocked. If you sell past your tier, Today asks you to move up. Manage, change or cancel from Settings; it opens a secure page run by Stripe.